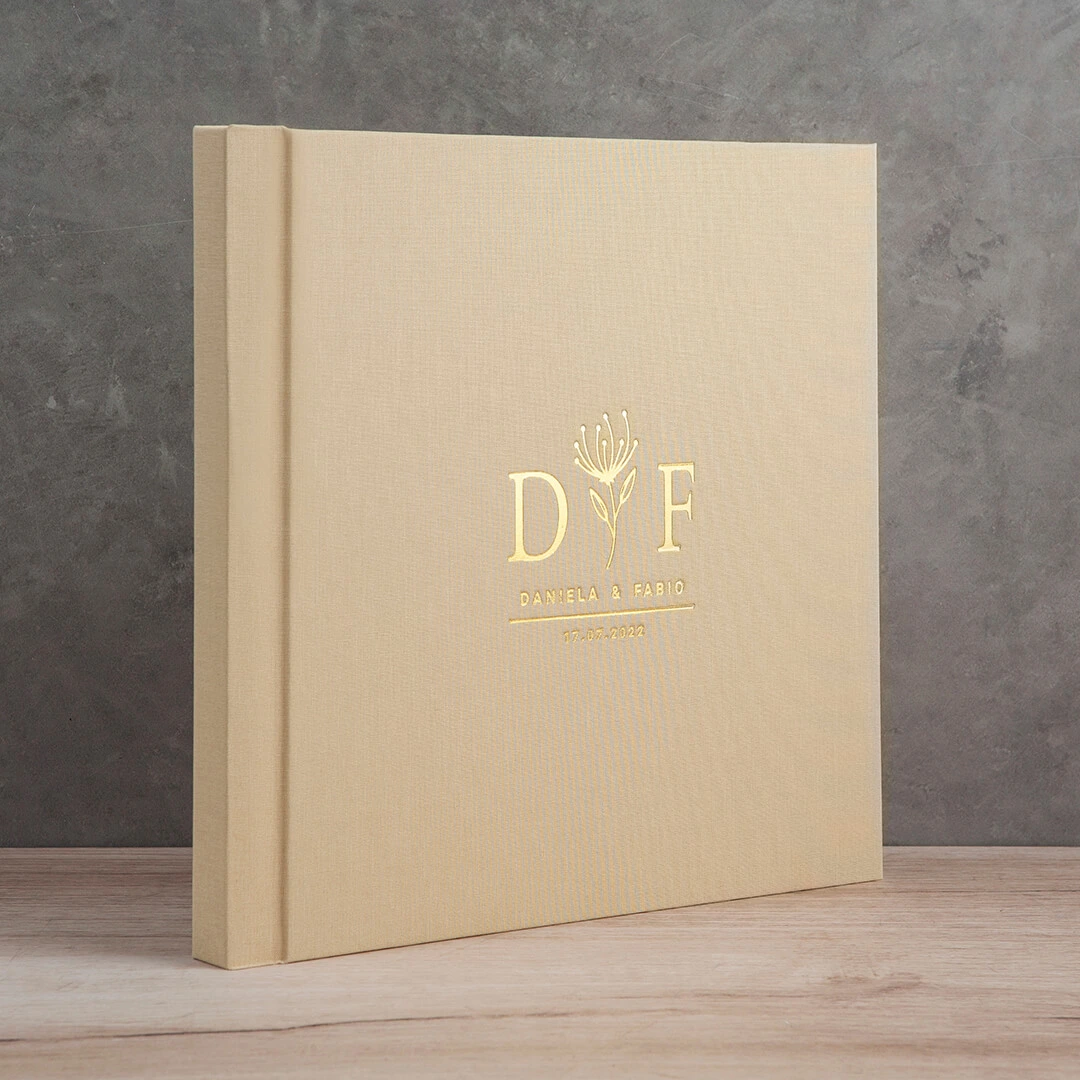
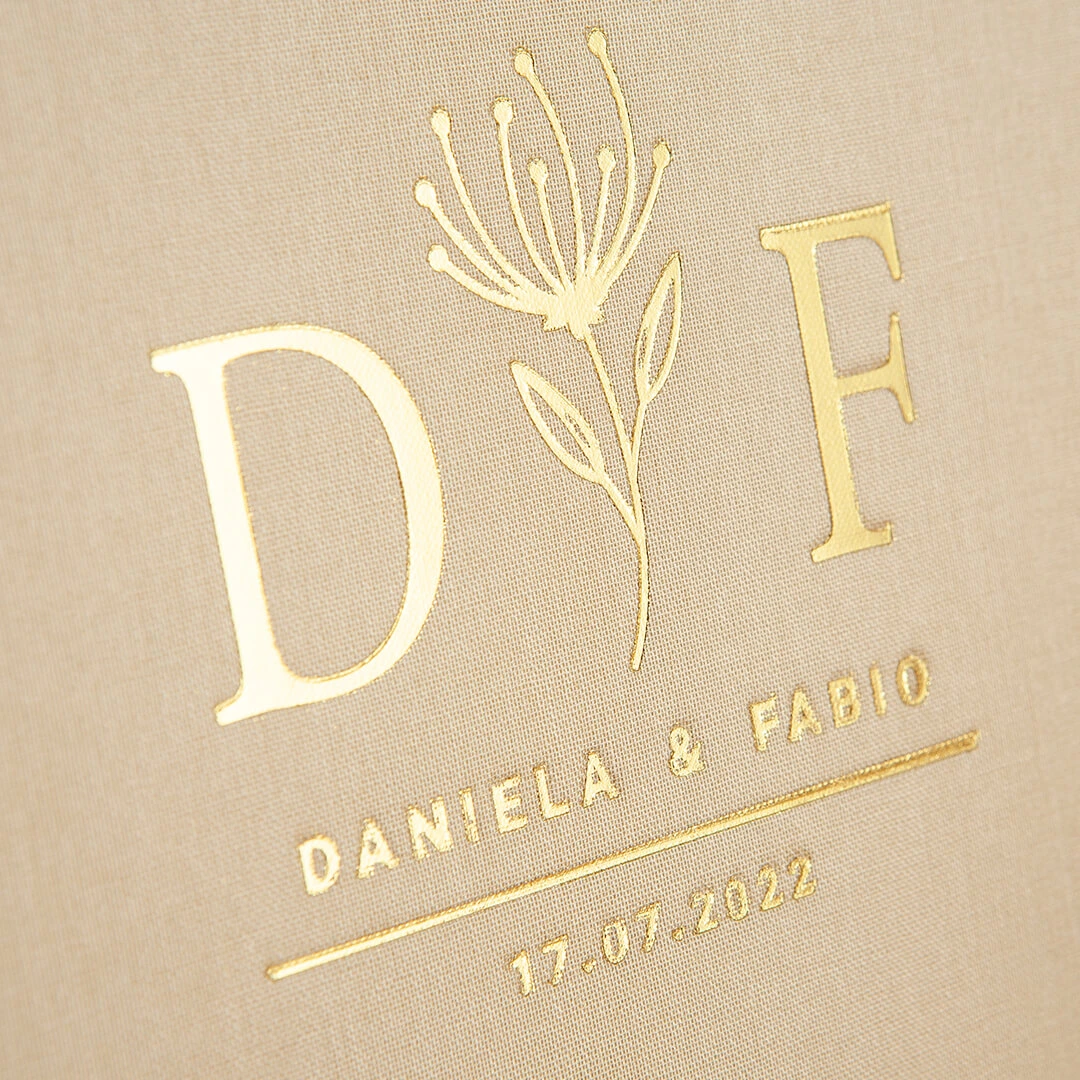
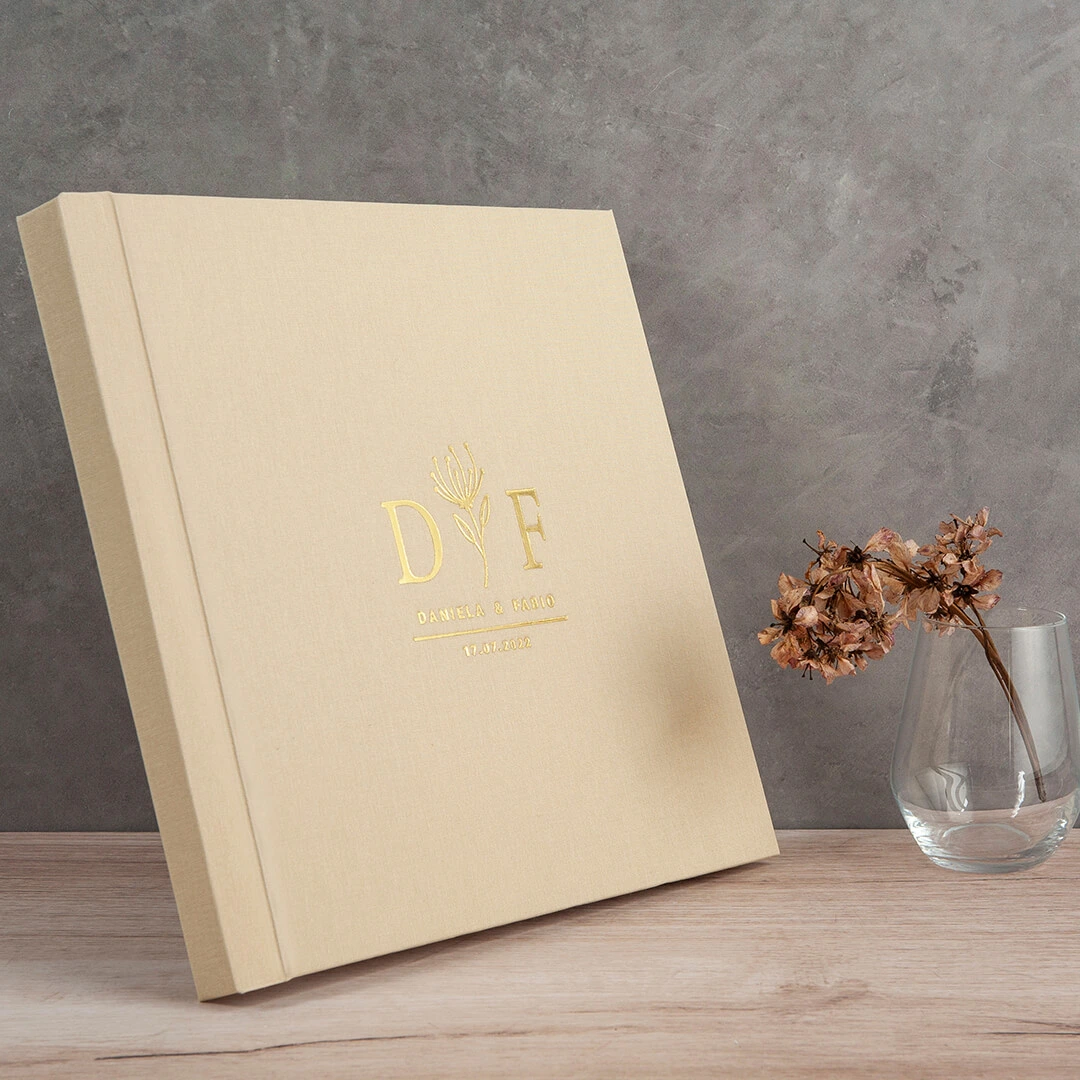
CUSTOM EMBOSSING

Custom Embossing

Highlight the uniqueness of your book with our new custom embossing service. Send us the desired design and deliver an exclusive cover to your clients.
Requisitos das Imagens
IMAGE REQUIREMENTS

Vectorized file in .ai or .eps format

Tempo de Produção
PRODUCTION TIME

Add up to 4 business days to the production timeline

Preços
PRICES

Loginto your reserved area (Exclusive to Professionals) to access our price list

Sizes

Available sizes for the embossing plate:

3.15 x 3.15in 4 x 4in 6 x 6in

Embossing Personalizado

Extras

Available in 7 colors:

Embossing Personalizado

FREQUENTLY ASKED QUESTIONS

To create your custom embossing, we produce a plate with your design, which will be etched onto the album cover through a process of pressure and heat.

Yes, all plates are kept for 6 months from the order date. If you want to order an album with the same custom embossing again, you can reuse the same plate. To do this, just consult your Floricolor account manager.

There are no specific limitations, but you should avoid very small details and overly complex designs. Opt for simple, well-aligned elements for impactful results.

The custom embossing will be centered on the card of the album's cover.

You should send a vectorized file in .ai or .eps format.

A "vectorized file" is a type of file that contains graphics or images represented through mathematical formulas and geometry, rather than individual pixels. This approach uses elements like dots, curves, lines, and colors to create scalable images without loss of quality.

To vectorize your design, you need to turn an image or graphic into a vector representation, allowing scalability and editing without loss of quality. Here are the general steps you can follow to vectorize your design:

Software Choice: You'll need vector editing software like Adobe Illustrator, CorelDRAW, or Inkscape (free) to perform the vectorization.

Import the Image: Open the software and import the image you want to vectorize. It can be a drawing, logo, illustration, or any image you want to turn into a vector.

Create a Vector Layer: Typically, the process involves creating a new vector layer or object above the imported image.

Tool Selection: Use the software tools to trace or outline the shapes in the image. This might involve using pencil, pen, Bézier curve, or other vector drawing tools.

Define Shapes: Select distinct areas of the image and outline their edges with Bézier curves or other vector lines. Try to simplify shapes, using the fewest dots possible to be efficient.

Set Colors and Fills: Assign colors and fills to the shapes you've created. Remember that solid colors work best in a vector context.

Details and Editing: Continue working on the details of your design, adjusting curves, aligning elements, and adding or editing parts as needed.

Save as Vector: When satisfied with the vectorized design, save it in the appropriate vector format, like .AI or .EPS. These formats will preserve the vector information for future edits and uses.

Remember that vectorization can be a delicate process, especially for complex images. If you're not comfortable with vectorization, you can always request a quote from us to perform this service for you.

Alma Collection, Art Book, Basic Collection, Blossom Collection, Boite de Luxe, Bold Collection 25, Bold Collection 150, Boudoir Portfolio, Boutique Book, Dharka Collection, Duo Collection, Eco Collection Event, Eco Collection Kids, Floribox, Fusion Book, Kant Collection, Livre Plat, Mini Album Combo, Minimalis Collection, Portfolio Mat, Story Collection, Studio Collection, The Concept Collection and Vintage Collection.

Floricolor © Copyright 2023